How to Use a Camera in Minecraft
This Minecraft tutorial explains how to use a camera with screenshots and step-by-step instructions.
In Minecraft Education Edition, you can use a camera to take a picture from the first-person perspective. Let's explore how to take a photo in the game.
Required Materials
In Minecraft, these are the required materials to use a camera:


Steps to Use a Camera
1. Add the Camera and Portfolio to Hotbar
In this tutorial, we have placed a camera in the first slot and a portfolio in the second slot of our hotbar.
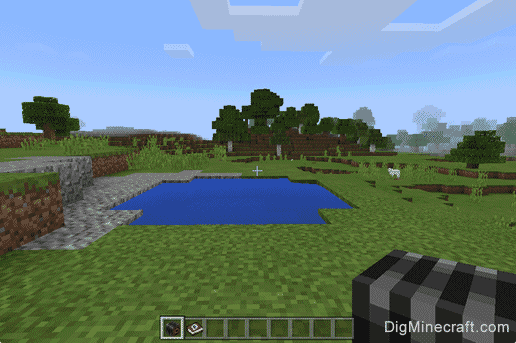
Select the camera in your hotbar.
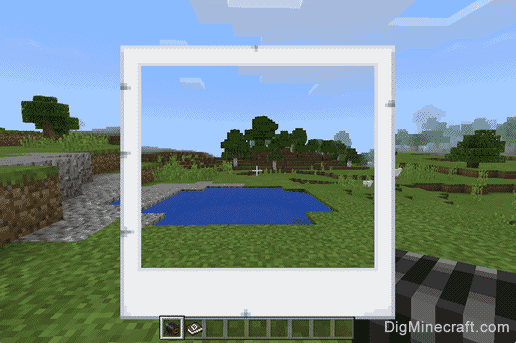
2. Take the Photo
Next, position your pointer (the plus sign) where you would like to take the photo.
The game control to take the photo with the camera depends on the version of Minecraft:
- For Education Edition, right click.
When the photo is taken, you will see a white photo box appear around the center of the screen and the sound of a camera shutter. This means that the photo has been taken.
3. Photo is Automatically Saved to Portfolio
Now, that the photo has been taken with the camera, where did it go? All of your photos are automatically saved to your portfolio.
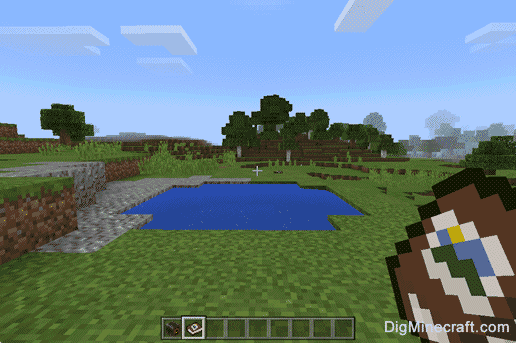
So let's select the portfolio in the hotbar next.
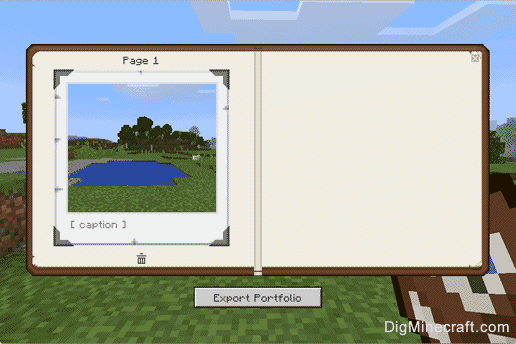
3. Open the Portfolio
To see the photos saved inside your portfolio, you will need to open the portfolio in your hotbar.
The game control to open the portfolio depends on the version of Minecraft:
- For Education Edition, right click.
Congratulations, you just learned how to use a camera in Minecraft.
Things to Do with Cameras
Here are some activities that you can do with cameras in Minecraft:
Advertisements