How to Use a Dispenser in Minecraft
This Minecraft tutorial explains how to use a dispenser with screenshots and step-by-step instructions.
A dispenser can store and dispense up to 9 stackable items. Depending on what you want to do, you can put items such as arrows, splash potions, TNT, or lava buckets into the dispenser. Each time the dispenser is activated by a redstone device, it will dispense an item.
Let's explore how to create a dispenser that shoots arrows when activated by a tripwire hook.
Required Materials for this Example
In this Minecraft example, these are the required materials you will need:


Steps to Use a Dispenser
1. Place the Dispenser
In this example, we are going to show you how to fill a dispenser with arrows and connect it to a tripwire circuit. Then when someone activates the tripwire, an arrow will shoot from the dispenser.
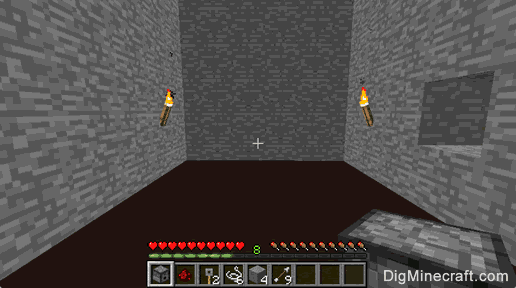
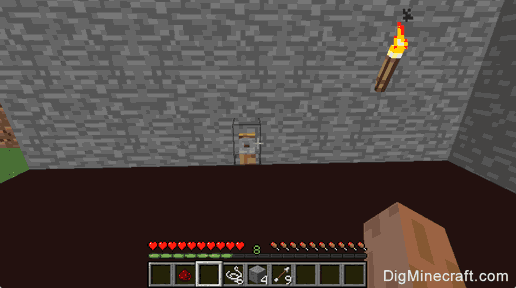
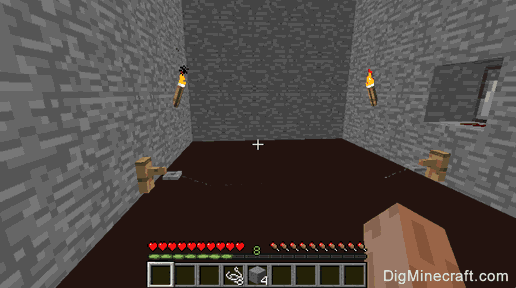
On the right side, we have dug a hole in the wall that is 2 blocks deep. This is where we will hide our dispenser.
Select the dispenser in the hotbar.
Place the dispenser in the wall. The game control to place the dispenser depends on the version of Minecraft:
- For Java Edition (PC/Mac), right click on the block.
- For Pocket Edition (PE), you tap on the block.
- For Xbox 360 and Xbox One, press the LT button on the Xbox controller.
- For PS3 and PS4, press the L2 button on the PS controller.
- For Wii U, press the ZL button on the gamepad.
- For Nintendo Switch, press the ZL button on the controller.
- For Windows 10 Edition, right click on the block.
- For Education Edition, right click on the block.
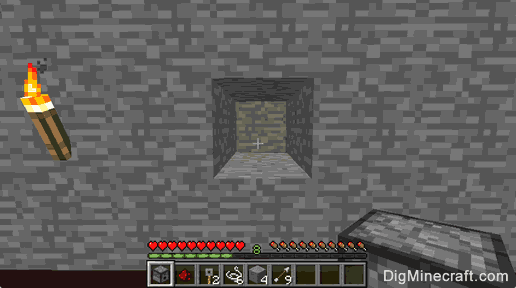
Now the dispenser will be hidden in the wall (1 block deep).
2. Place the Tripwire Hooks
Next, we need a redstone device to activate the dispenser. You can use any redstone device such as a button, lever, pressure plate, or tripwire hook. In this example, we are going to use tripwire hooks to activate the dispenser.
Select the tripwire hooks in the hotbar and place 1 tripwire hook on the wall below the dispenser. The game control to place each tripwire hook depends on the version of Minecraft:
- For Java Edition (PC/Mac), right click on the block.
- For Pocket Edition (PE), you tap on the block.
- For Xbox 360 and Xbox One, press the LT button on the Xbox controller.
- For PS3 and PS4, press the L2 button on the PS controller.
- For Wii U, press the ZL button on the gamepad.
- For Nintendo Switch, press the ZL button on the controller.
- For Windows 10 Edition, right click on the block.
- For Education Edition, right click on the block.
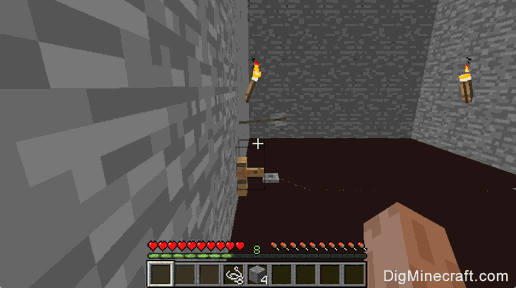
And then place another tripwire hook on the other side of the wall.
3. Add the String to the Tripwire Hooks
Now we need to complete the tripwire circuit by connecting the 2 tripwire hooks together with string. In this example, we need 3 string to complete the circuit.
Select the string in your hotbar and highlight the block that is one block over from the tripwire hook. Place the string on the block. The game control to place the string depends on the version of Minecraft:
- For Java Edition (PC/Mac), right click on the block.
- For Pocket Edition (PE), you tap on the block.
- For Xbox 360 and Xbox One, press the LT button on the Xbox controller.
- For PS3 and PS4, press the L2 button on the PS controller.
- For Wii U, press the ZL button on the gamepad.
- For Nintendo Switch, press the ZL button on the controller.
- For Windows 10 Edition, right click on the block.
- For Education Edition, right click on the block.
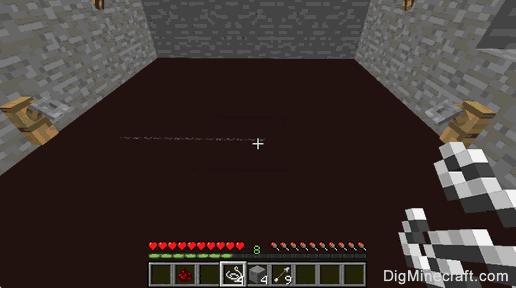
Next, highlight the next block over and place the second string.
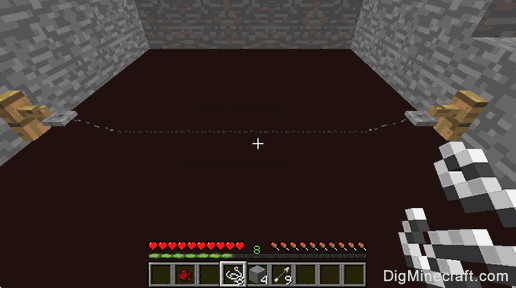
Finally, complete the circuit by placing the third string. When the tripwire circuit is completed, you will hear a click sound. You should now see the tripwire hooks pull tight and the strings will become connected and lay across the ground.
4. Connect with Redstone
Now you need to connect the dispenser to the tripwire hook with redstone.
Select the redstone in your hot bar and place the redstone on any blocks separating the dispenser from the tripwire hook. This will make a trail of redstone wire.
In this example, we placed 1 redstone on the block in front of the dispenser.
5. Fill the Dispenser with Arrows
Since the dispenser starts out empty, you will need to open the dispenser to fill it with items from your inventory.
The game control to open the dispenser depends on the version of Minecraft:
- For Java Edition (PC/Mac), right click on the dispenser.
- For Pocket Edition (PE), you tap on the dispenser.
- For Xbox 360 and Xbox One, press the LT button on the Xbox controller.
- For PS3 and PS4, press the L2 button on the PS controller.
- For Wii U, press the ZL button on the gamepad.
- For Nintendo Switch, press the ZL button on the controller.
- For Windows 10 Edition, right click on the dispenser.
- For Education Edition, right click on the dispenser.
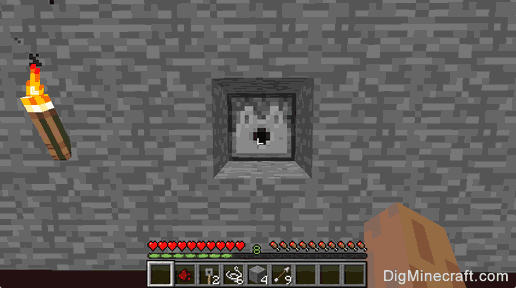
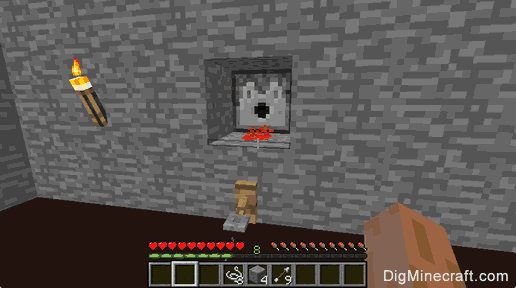
Now you should see the Dispenser menu. There are 9 boxes at the top of the menu that you can fill with stackable items. These are the items that the dispenser will use when it is activated.
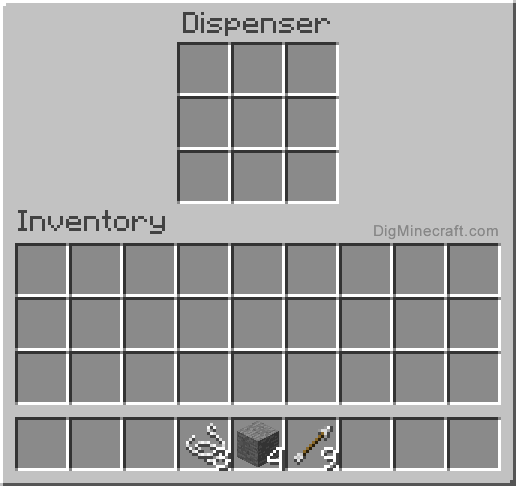
In this example, we will move our 9 arrows from our hot bar to one of the top boxes. We could have put up to 64 arrows in each of the boxes.
The dispenser now has 9 arrows that it can shoot out, one at a time.
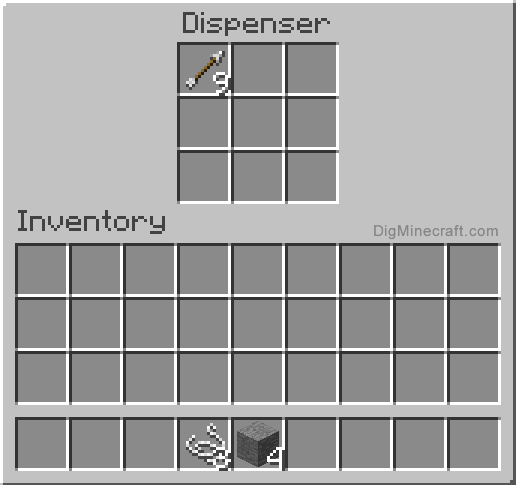
6. Dispenser is Ready!
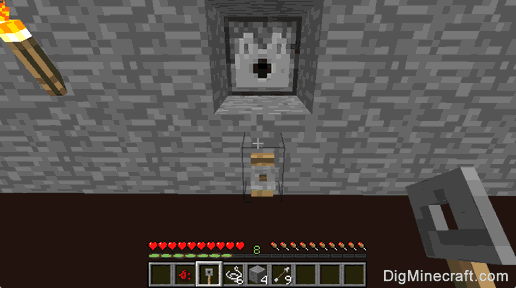
The dispenser is now filled with arrows and ready to work. Here is what it looks like:
5. Activate the Tripwire Circuit
Now if a player or mob steps on the tripwire, you will hear a click sound as the tripwire circuit is activated. This will cause the dispenser to shoot an arrow.
If you are fast enough, the arrow will miss and hit the wall.
Congratulations, you just learned how to use a dispenser in Minecraft.
Advertisements