NBT Tags for Villager in Minecraft (Java Edition 1.11/1.12)
This Minecraft tutorial explains the NBT tags (formerly called data tags) that you can use for a villager in Minecraft Java Edition (PC/Mac) 1.11 and 1.12.
TIP: If you are not running Minecraft Java Edition (PC/Mac) 1.11/1.12, find NBT tags for villager in another version of Minecraft:
Background
In Minecraft Java Edition 1.11 and 1.12, the entity value for a villager is villager. The villager entity has a unique set of data tags that can be used in Minecraft commands such as: /summon, /entitydata, /give, /fill, /setblock, /testfor.




What are NBT tags (formerly called Data Tags)?
NBT tags allow you to set certain properties of an entity (such as villager). The NBT tag is always surrounded in {} such as {Profession:4}. If there is more than one NBT tag used in a game command, the NBT tags are separated by a comma such as {Profession:4,:CustomName:Joe}.
List of NBT Tags
Here is a list of the NBT tags that you can use for villager in Minecraft Java Edition (PC/Mac) 1.11 and 1.12:
| NBT Tag | Value (Description) | Works With |
|---|---|---|
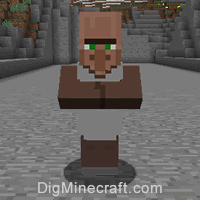
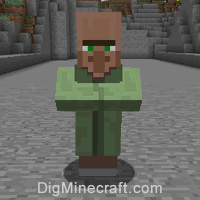
| Profession | 0 (Villager wears brown robe) Example |
/summon /entitydata |
| Career | number (The career of the villager. Each career has different trades available. It should be used with the CareerLevel data tag. See villager trades to learn about the different trades based on career and career level.) If Profession=0: If Profession=1: If Profession=2: If Profession=3: If Profession=4: If Profession=5: Example for Cartographer that is Career Level 3 |
/summon /entitydata |
| CareerLevel | number (The career level of the villager. Each career level has different trades available. It should be used with the Career data tag. If you enter a number that is higher than the maximum level, the villager will not have any trades to offer. See villager trades to learn about the different trades based on career and career level.) Farmer (3 is max level) Armorer (3 is max level) Example for Leatherworker that is Career Level 1 |
/summon /entitydata |
| Offers | Lists the custom trades for the villager. Syntax where trade is: Example (1 trade) Example (2 trades) TIP: Try our Villager Trade Generator to help you create custom trades! |
/summon /entitydata |
| Willing | 0 (The villager is not looking for a mate) Example |
/summon /entitydata |
| Age | ticks (The age of the villager in game ticks. Use 0 or higher for an adult. Use a negative number such as -25000 for a baby.) Example |
/summon /entitydata |
| ForcedAge | ticks (When a baby villager matures, the Age data tag will be set to ForcedAged. However, there have been bugs with this data tag so it may not work properly.) Example |
/summon /entitydata |
| CustomName | name (The name to assign to the villager. If the name has spaces, you need to surrounded the name value in "".) Example |
/summon /entitydata |
| Health | number (The number of health points the villager has) Example |
/summon /entitydata |
| AbsorptionAmount | number (The number of absorption health points the villager has) Example |
/summon /entitydata |
| Invulnerable | 0 (The villager will take damage like normal) Example |
/summon /entitydata |
| PersistenceRequired | 0 (The villager will despawn naturally) Example |
/summon /entitydata |
| NoAI | 0 (The villager will have artificial intelligence and will move/behave like normal) Example |
/summon /entitydata |
| Silent | 0 (The villager will make its usual noises in the game) Example |
/summon /entitydata |
| Fire | ticks (The number of game ticks until the villager is no longer on fire - there are 20 ticks in a second) Example |
/summon /entitydata |
| PortalCooldown | ticks (The number of game ticks until the villager can go through a portal again - there are 20 ticks in a second) Example |
/summon /entitydata |
| Air | ticks (The number of game ticks the villager has air left for) Example |
/summon /entitydata |
| ArmorItems | Since a villager does not wear armor, you can use this data tag to list 4 items that you want the villager to drop when it is killed (4 custom drops) Syntax Example |
/summon /entitydata |
| ArmorDropChances | The drop chances for each of the 4 items listed in ArmorItems. A value of 1.0f means 100% chance of the item being dropped when the villager is killed, 0.5f means 50%, 0.2f means 20%, and so on. Example |
/summon /entitydata |
| UUIDLeast | A number that specifies the right half of the UUID for the villager (use UUIDLeast and UUIDMost to target/find a particular villager in the game) Example |
/summon /entitydata |
| UUIDMost | A number that specifies the left half of the UUID for the villager (use UUIDLeast and UUIDMost to target/find a particular villager in the game) Example |
/summon /entitydata |
| id | villager (The entity value used to represent a villager in the EntityTag or Passengers tag) Example |
/summon /give |
| Passengers | The mob that is riding on the villager. Use the entity value for the passenger mob Example of skeleton as passenger |
/summon /entitydata |
NBT Tag Examples
To summon a villager with a custom name of Joe:
/summon villager ~ ~ ~ {CustomName:Joe}
To summon a villager that is a Level 3 Cartographer:
/summon villager ~ ~ ~ {Profession:1, Career:2, CareerLevel:3}
To summon a villager that has a custom trade of 6 emeralds for a diamond chestplate (use a command block to run this command):
/summon villager ~ ~1 ~ {Offers:{Recipes:[{buy:{id:emerald,Count:6}, sell:{id:diamond_chestplate,Count:1}, maxUses:9999999}]}}
To summon a villager that has 3 custom drops (3 redstone, 1 gold horse armor and 2 iron ingot):
/summon villager ~ ~1 ~ {ArmorItems:[{Count:3,id:redstone}, {Count:1,id:golden_horse_armor}, {Count:2,id:iron_ingot}], ArmorDropChances:[1.0f,1.0f,1.0f,1.0f]}
To give the closest player a villager spawn egg in Minecraft Java Edition (PC/Mac) 1.11 and 1.12:
/give @p spawn_egg 1 0 {EntityTag:{id:minecraft:villager}}
Target Selectors
Before we finish discussing data tags, let's quickly explore how to use the @e target selector. The @e target selector allows you to target entities in your commands. If you use the type=villager value, you can target villagers:
@e[type=villager]
You can also add a radius value to target villagers within a certain radius of blocks (for example, r=5 lets you target villagers within a 5 block radius of where the command is run):
@e[type=villager,r=5]
Target Selector Examples
To give all villagers the name Joe within a 5 block radius:
/entitydata @e[type=villager,r=5] {CustomName:Joe}
To test for all villagers within a 50 block radius:
/testfor @e[type=villager,r=50]
To summon a lightning bolt at all villagers (and turn them into witches):
/execute @e[type=villager] ~ ~ ~ /summon lightning_bolt
To kill all villagers:
/kill @e[type=villager]
Next, learn how to use the game commands in Minecraft.
Command Examples
Here are some game command examples for a villager in Minecraft:
Command Generators
If you need help, you can use these tools to automatically generate commands for you:
Advertisements


