How to Make a Nether Wart Farm in Minecraft
This Minecraft tutorial explains how to make a Nether Wart farm with screenshots and step-by-step instructions.
You can grow Nether Warts in your own garden with these really easy steps. Just collect a few items from the Nether and grow it in your own garden to get even more Nether Warts. And never run out of Nether Warts again! Nether Warts are essential for brewing potions in Minecraft.
Let's explore how to make a Nether Wart farm in Minecraft.
Required Materials for this Nether Wart Farm
In this Minecraft example, these are the required materials you will need:


Steps to Make a Nether Wart Farm
1. Place the Soul Sand
Start by placing soul sand in your garden. This will be the "type of soil" that you will use to cultivate and grow the Nether Warts. The game control to place the soul sand depends on the version of Minecraft:
- For Java Edition (PC/Mac), right click on the block.
- For Pocket Edition (PE), you tap on the block.
- For Xbox 360 and Xbox One, press the LT button on the Xbox controller.
- For PS3 and PS4, press the L2 button on the PS controller.
- For Wii U, press the ZL button on the gamepad.
- For Nintendo Switch, press the ZL button on the controller.
- For Windows 10 Edition, right click on the block.
- For Education Edition, right click on the block.
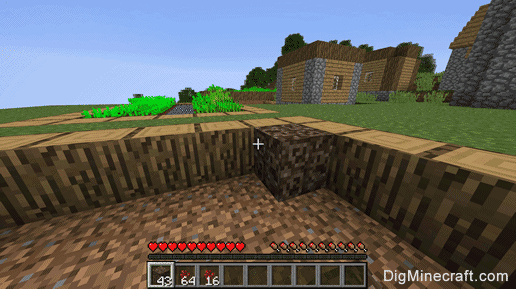
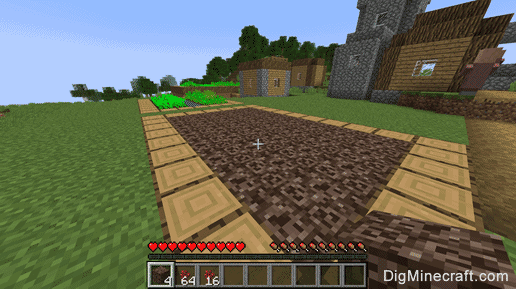
In this tutorial, we have filled up our whole garden with soul sand. That way, we can grow lots of Nether Wart!
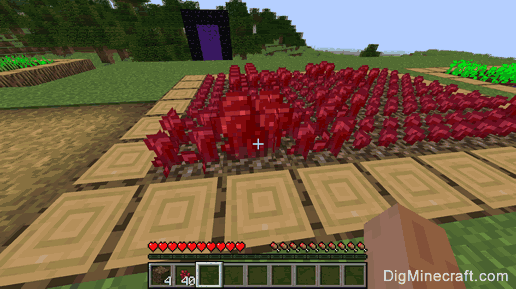
2. Plant the Nether Warts
Next, plant the Nether Warts in the soul sand. The game control to plant the Nether Warts depends on the version of Minecraft:
- For Java Edition (PC/Mac), right click on the block.
- For Pocket Edition (PE), you tap on the block.
- For Xbox 360 and Xbox One, press the LT button on the Xbox controller.
- For PS3 and PS4, press the L2 button on the PS controller.
- For Wii U, press the ZL button on the gamepad.
- For Nintendo Switch, press the ZL button on the controller.
- For Windows 10 Edition, right click on the block.
- For Education Edition, right click on the block.

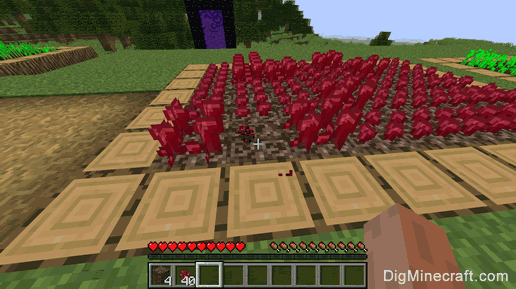
3. Harvest the full grown Nether Warts
Once the Nether Warts have fully grown, you can harvest them. The game control to dig up the Nether Warts depends on the version of Minecraft:
- For Java Edition (PC/Mac), left click and hold on the Nether Wart.
- For Pocket Edition (PE), you tap and hold on the Nether Wart.
- For Xbox 360 and Xbox One, press and hold the RT button on the Xbox controller.
- For PS3 and PS4, press and hold the R2 button on the PS controller.
- For Wii U, press and hold the ZR button on the gamepad.
- For Nintendo Switch, press and hold the ZR button on the controller.
- For Windows 10 Edition, left click and hold on the Nether Wart.
- For Education Edition, left click and hold on the Nether Wart.
Be sure to pick up the Nether Warts and add them to your inventory. You can then replant the Nether Warts in the soul sand to grow even more! Just like you do with your other gardens.
Congratulations, you just learned how to make a Nether Wart Farm in Minecraft.
Advertisements