How to Change the Name of the NPC in Minecraft
This Minecraft tutorial explains how to change the name of the NPC (Non Player Character) with screenshots and step-by-step instructions.
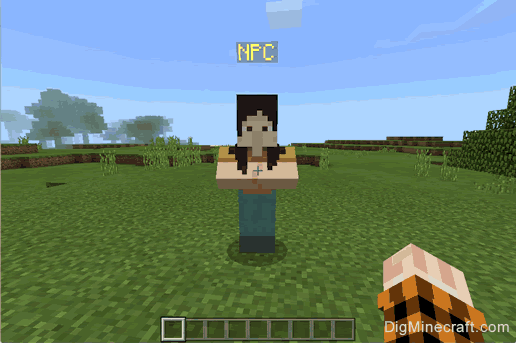
In Minecraft Education Edition, the NPC has a name displayed above it that says "NPC". Let's explore how to change the name of the NPC.
Steps to Change the Name of the NPC
1. Open the Non Player Character Menu
In this tutorial, we've created the NPC using the NPC spawn egg. By default, the name showing above the NPC will say "NPC". Let's change it to something more fun!
To change the name of the NPC, you will first need to open the Non Player Character menu. To open this menu, you will need right-click on the NPC (and have World Builder permissions).
TIP: To customize the name of the NPC, you must have World Builder permissions.
How to give yourself Word Builder Permissions
You can use the /wb command to quickly toggle your world builder status between false and true:
/wb
Or you can use the /ability command to set your world builder status to true:
/ability @p worldbuilder true
This is the what the Non Player Character menu looks like:
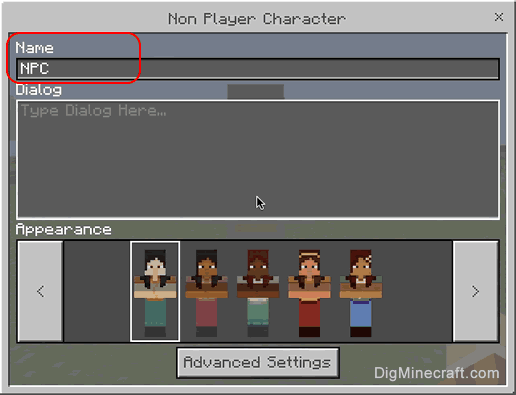
As you can see, by default, the Name field is set to "NPC". This is the value that appears above the NPC.
2. Change the Name
To change the name, type your new value in the Name field. You can enter a value up to 32 characters long.
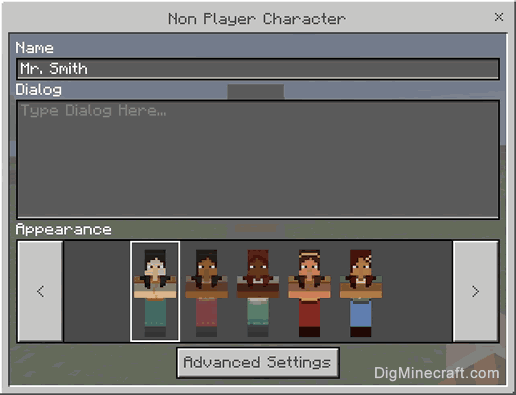
In this example, we've entered "Mr. Smith" as the new name for the NPC. Once you have entered the new name, you can close the Non Player Character menu.
3. NPC will show the New Name
Now, when you return to the game, you will see Mr. Smith appear above the NPC.

Congratulations, you just learned how to change the name of the NPC in Minecraft.
Other Things to Do with the NPC
Here are some other activities that you can do with the NPC in Minecraft:

Advertisements